ON-PREMISE ORACLE DATABASE BACKUP USING ORACLE OCI BACKUP CLOUD SERVICE
Description:-
The Oracle Database Cloud Backup Module for OCI makes it possible to perform backups and restores with Oracle Cloud Infrastructure. Backups are stored in Oracle Cloud Infrastructure Object Storage.
Oracle Database Cloud Backup Module for OCI is a system backup to tape (SBT) interface that is integrated with Recovery Manager (RMAN). You can use standard RMAN commands to perform backup, restore, recovery, and maintenance operations.
High Level Steps:-
Overview Steps To Backup On-Premise Oracle Database Using Oracle Oci Backup Cloud Service
- Subscribe to the Oracle Database Backup Cloud Service.
- Download the Oracle Database Cloud Backup Module from
- https://www.oracle.com/database/technologies/oracle-cloud-backup-downloads.html
- Create OCI Object Storage to be used as a backup location.
- Install backup module on the systems where the Oracle database is running.
- Configure RMAN to use the installed Backup Module.
- Start performing backup operations to the cloud using familiar RMAN commands.
Step:- 1 To create the bucket or object storage
Open the navigation menu.
Under Core Infrastructure, click Object Storage

2. Choose the compartment for your new bucket. A list of existing buckets is displayed
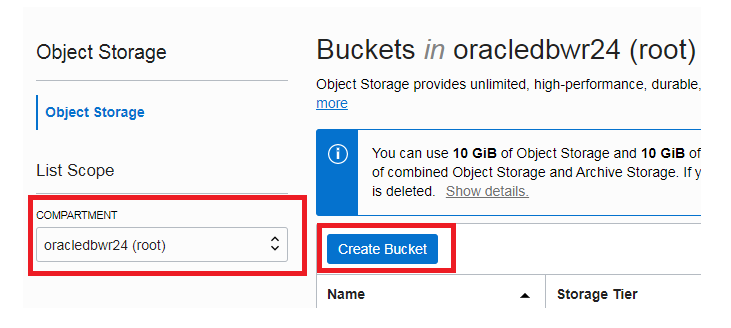
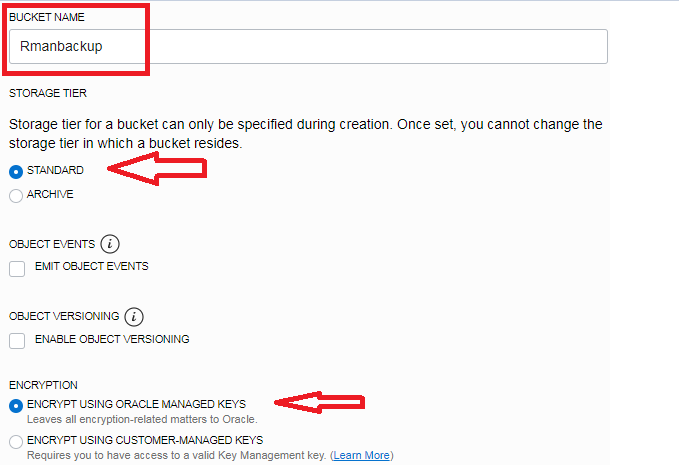
3. Click Create Bucket button. In the Create Bucket dialog, enter the following:
Name RMANBACKUP
For Storage Tier, select Standard option
For Encryption, select “ENCRYPT USING ORACLE-MANAGED KEYS”
Optionally apply a Tag
4. Install Database Cloud Backup Module
Before running the installer on your database system, you need to gather below information from your cloud account.
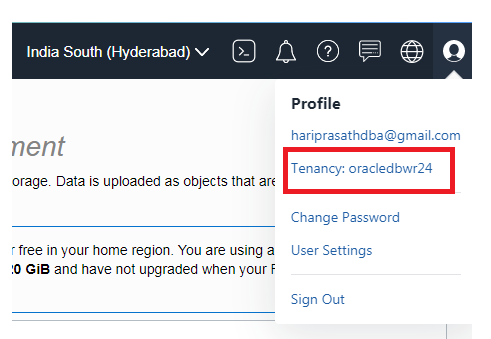
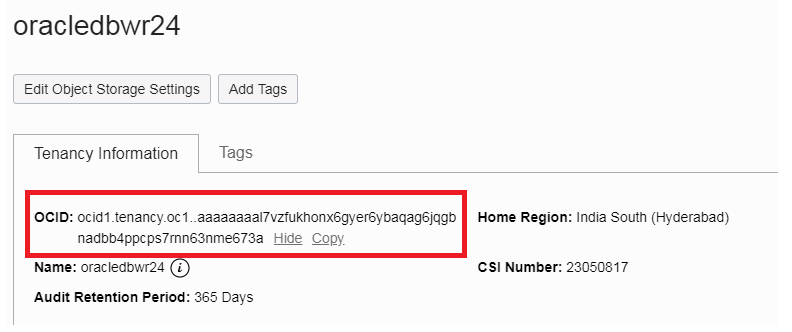
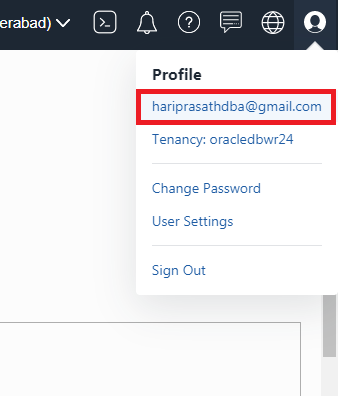
- Tenancy OCID: You can find it by clicking on the Profile icon on the top right corner of the cloud console and selecting Tenancy: <your tenancy name>from the drop-down menu.
You will be taken to your tenancy detail information where you can find its OCID.
Copy the OCID string and save it in a temporary location for later use. The OCID string is similar to: ocid1.tenancy.oc1..aaaaaaaal7vzfukhonx6gyer6ybaqag6jqgbnadbb4ppcps7rnn63nme673a
- Compartment OCID: For the compartment where your backup bucket is placed.
Compartment page can be reached by selecting Identity –> Compartments on the left side of the console menu.
Copy the OCID of the compartment and save the compartment OCID in a temporary location for later use.

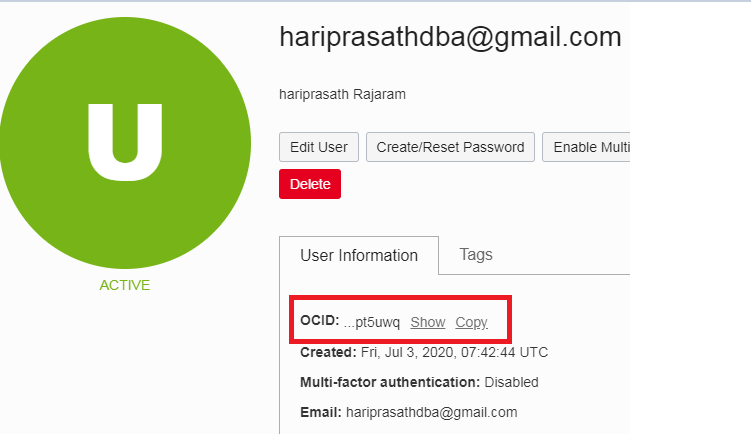
- Cloud User OCID: The user must have permission to manage bucket and objects in the compartment previously identified. You can find it by clicking on the Profile icon on the top right corner of the cloud console and selecting <username>, copy the OCID for the specific user and save it in a temporary location for later use.
5. Prepare your key pair for API signing in PEM format as described here
https://docs.cloud.oracle.com/iaas/Content/API/Concepts/apisigningkey.htm
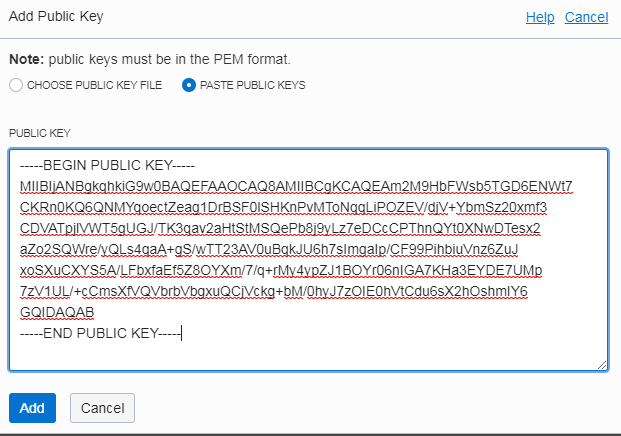
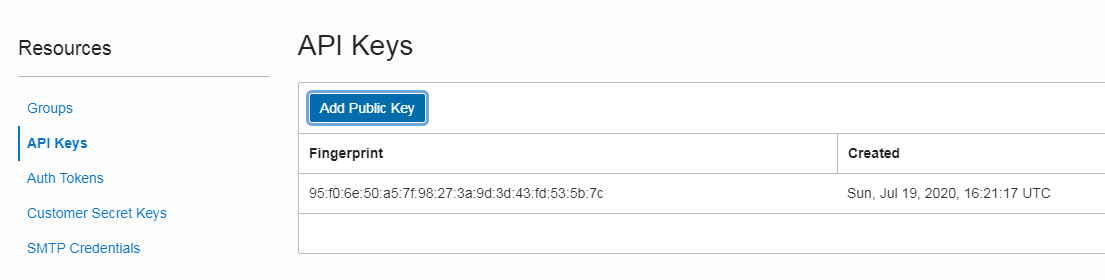
Save your private key file and copy your public key to the user management console page. You can do that by clicking on the Profile icon on the top right corner of the cloud console and selecting <username>. In “User Details” page, click “Add Public Key” button to add your public key.
Note key fingerprint and copy it in a temporary location for later use.
[oracle@Prod21 key]$ openssl genrsa -out oci_key.pem 2048
Generating RSA private key, 2048 bit long modulus
…………………..+++
………………………………………+++
e is 65537 (0x10001)
[oracle@Prod21 key]$ ll
total 12
-rw-r–r–. 1 oracle oinstall 1679 Jul 19 21:45 oci_key.pem
[oracle@Prod21 key]$ chmod 775 oci_key.pem
[oracle@Prod21 key]$ openssl rsa -pubout -in oci_key.pem -out oci_key_public.pem
writing RSA key
[oracle@Prod21 key]$ ll
total 8
-rwxrwxr-x. 1 oracle oinstall 1679 Jul 19 21:45 oci_key.pem
-rw-r–r–. 1 oracle oinstall 451 Jul 19 21:48 oci_key_public.pem
[oracle@Prod21 key]$ chmod 775 oci_key_public.pem
[oracle@Prod21 key]$ openssl rsa -pubout -outform DER -in oci_key.pem | openssl md5 -c
writing RSA key
(stdin)= 95:f0:6e:50:a5:7f:98:27:3a:9d:3d:43:fd:53:5b:7c
[oracle@Prod21 key]$ ll
total 8
-rwxrwxr-x. 1 oracle oinstall 1679 Jul 19 21:45 oci_key.pem
-rwxrwxr-x. 1 oracle oinstall 451 Jul 19 21:48 oci_key_public.pem
[oracle@Prod21 key]$ cat oci_key_public.pem
—–BEGIN PUBLIC KEY—–
MIIBIjANBgkqhkiG9w0BAQEFAAOCAQ8AMIIBCgKCAQEAm2M9HbFWsb5TGD6ENWt7
CKRn0KQ6QNMYqoectZeag1DrBSF0lSHKnPvMToNqqLiPOZEV/djV+YbmSz20xmf3
CDVATpjlVWT5gUGJ/TK3qav2aHtStMSQePb8j9yLz7eDCcCPThnQYt0XNwDTesx2
aZo2SQWre/yQLs4qaA+gS/wTT23AV0uBqkJU6h7sImgaIp/CF99PihbiuVnz6ZuJ
xoSXuCXYS5A/LFbxfaEf5Z8OYXm/7/q+rMy4ypZJ1BOYr06nIGA7KHa3EYDE7UMp
7zV1UL/+cCmsXfVQVbrbVbgxuQCjVckg+bM/0hyJ7zOIE0hVtCdu6sX2hOshmIY6
GQIDAQAB
—–END PUBLIC KEY—–


6.Download OCI backup installation module from OTN site
https://www.oracle.com/database/technologies/oracle-cloud-backup-downloads.html
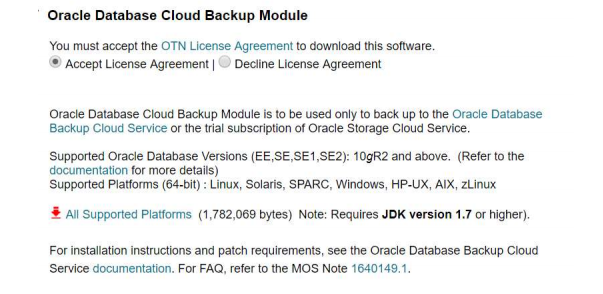
Accept the agreement and download the Backup module by clicking “All Supported Platforms” link. It will download opc_installer.zip. Download and extract it. We can find “oci_installer” folder inside the unzipped content. In the oci_installer folder we get to see oci_install.jar file. Invoke oci_installer using JDK 1.7 or higher to install oracle OCI cloud backup module.
[oracle@Prod21 key]$ java -version
openjdk version “1.8.0_102”
OpenJDK Runtime Environment (build 1.8.0_102-b14)
OpenJDK 64-Bit Server VM (build 25.102-b14, mixed mode)
[oracle@Prod21 Opc_Rman]$ ll
total 1776
drwxrwxr-x. 3 oracle oinstall 48 Oct 19 2019 __MACOSX
drwx——. 4 oracle oinstall 79 Oct 19 2019 opc_installer
-rwxr–r–. 1 oracle oinstall 1816114 Jul 19 18:37 opc_installer.zip
- Identify the Object Storage API endpoint for the region your backups will be sent to. The endpoint format will
https://objectstorage.<region>.oraclecloud.com (https://objectstorage.ap-hyderabad-1.oraclecloud.com)
Now run the installer using the parameters that you prepared in advance from above. Make sure JDK version 1.7 or later is installed on your system.
Installation Syntax:
java -jar oci_install.jar -host <endpoint from #Step 7>
-pvtKeyFile <local location of the file containing the private key in PEM format from #Step 5>
-pubFingerPrint <public key fingerprint from #Step 5>
-tOCID <tenancy OCID from #Step 1>
-cOCID <compartment OCID from #Step 2>
-uOCID <user OCID from #Step 3>
-walletDir <directory where the installation will store the credential wallet>
-libDir <directory where the installation will store the SBT library>
-configfile <configuration file name created during installation>
-bucket <bucket name>
Installing the Oracle Database Cloud Backup Module for OCI
[oracle@Prod21 oci_installer]$ java -jar oci_install.jar -host https://objectstorage.ap-hyderabad-1.oraclecloud.com \
> -pvtKeyFile ‘/home/oracle/key/oci_key.pem’ \
> -pubFingerPrint 95:f0:6e:50:a5:7f:98:27:3a:9d:3d:43:fd:53:5b:7c \
> -tOCID ocid1.tenancy.oc1..aaaaaaaal7vzfukhonx6gyer6ybaqag6jqgbnadbb4ppcps7rnn63nme673a \
> -uOCID ocid1.user.oc1..aaaaaaaaactrkiy7jzl4y3yedku35d3aadyyppq7a57wd3xrpfx4pppt5uwq \
> -walletDir /u01/app/oracle/product/12.2.0.1/db_1/dbs/opc_wallet \
> -libDir /u01/app/oracle/product/12.2.0.1/db_1/lib \
> -configfile /u01/app/oracle/product/12.2.0.1/db_1/dbs/opcdbwr.ora \
> -bucket Rmanbackup
Oracle Database Cloud Backup Module Install Tool, build 19.3.0.0.0DBBKPCSBP_2019-10-16
Oracle Database Cloud Backup Module credentials are valid.
Backups would be sent to bucket Rmanbackup.
Oracle Database Cloud Backup Module wallet created in directory /u01/app/oracle/product/12.2.0.1/db_1/dbs/opc_wallet.
Oracle Database Cloud Backup Module initialization file /u01/app/oracle/product/12.2.0.1/db_1/dbs/opcdbwr.ora created.
Downloading Oracle Database Cloud Backup Module Software Library from Oracle Cloud Infrastructure.
Download complete
Backing up the Database
RMAN> SET ENCRYPTION ON IDENTIFIED BY ‘Admin#123’ ONLY;
executing command: SET encryption
RMAN> run
{
allocate channel c1 TYPE ‘SBT_TAPE’ PARMS
‘SBT_LIBRARY=/u01/app/oracle/product/12.2.0.1/db_1/lib/libopc.so,
ENV=(OPC_PFILE=/u01/app/oracle/product/12.2.0.1/db_1/dbs/opcdbwr.ora)’;
backup current controlfile;
}
allocated channel: c1
channel c1: SID=48 device type=SBT_TAPE
channel c1: Oracle Database Backup Service Library VER=19.0.0.1
Starting backup at 19-JUL-20
channel c1: starting full datafile backup set
channel c1: specifying datafile(s) in backup set
including current control file in backup set
channel c1: starting piece 1 at 19-JUL-20
channel c1: finished piece 1 at 19-JUL-20
piece handle=06v5nuok_1_1 tag=TAG20200719T232404 comment=API Version 2.0,MMS Version 19.0.0.1
channel c1: backup set complete, elapsed time: 00:00:15
Finished backup at 19-JUL-20
Starting Control File and SPFILE Autobackup at 19-JUL-20
piece handle=c-1473061046-20200719-02 comment=API Version 2.0,MMS Version 19.0.0.1
Finished Control File and SPFILE Autobackup at 19-JUL-20
released channel: c1
Verify the Rman Backup.
RMAN> list backup of controlfile;
using target database control file instead of recovery catalog
List of Backup Sets
===================
BS Key Type LV Size Device Type Elapsed Time Completion Time
——- —- — ———- ———– ———— —————
5 Full 10.25M SBT_TAPE 00:00:03 19-JUL-20
BP Key: 5 Status: AVAILABLE Compressed: NO Tag: TAG20200719T232404
Handle: 06v5nuok_1_1 Media: objectstorage.ap-hyderaba..lecloud.com/n/axdazzzrombz/Rmanbackup
Control File Included: Ckp SCN: 1438301 Ckp time: 19-JUL-20
BS Key Type LV Size Device Type Elapsed Time Completion Time
——- —- — ———- ———– ———— —————
6 Full 10.25M SBT_TAPE 00:00:01 19-JUL-20
BP Key: 6 Status: AVAILABLE Compressed: NO Tag: TAG20200719T232420
Handle: c-1473061046-20200719-02 Media: objectstorage.ap-hyderaba..lecloud.com/n/axdazzzrombz/Rmanbackup
Control File Included: Ckp SCN: 1438312 Ckp time: 19-JUL-20
Successfully Rman Backup is stored on Oci Obeject Storage.
Connect with me:-
Telegram App:https://t.me/oracledbwr
LinkedIn:https://www.linkedin.com/in/hariprasathdba
Facebook:https://www.facebook.com/HariPrasathdba
FB Group:https://www.facebook.com/groups/894402327369506/
FB Page : https://www.facebook.com/dbahariprasath/?
Twitter : https://twitter.com/oracledbwr