In this article we are going to see how to install oracle 19c goldengate on Linux 7 server.
High level steps:-
- Download oracle 19c goldengate software click here to Download 191004_fbo_ggs_Linux_x64_shiphome.zip
- Create directory for the software and extract it to the directory
- install oracle 19c Goldengate using install wizard
- Check manager is up and running
Let’s start Demo:-
Step:-1 Create directory for the software and extract it to the directory
[oracle@dev19c ~]$ mkdir /u01/app/oracle/product/gg
Step:-2 Enter the goldengate home in bash_profile
[oracle@dev19c ~]$ cd /home/oracle/scripts/
[oracle@dev19c scripts]$ vi setEnv.sh
[oracle@dev19c scripts]$ cat setEnv.sh
# Oracle Settings
export TMP=/tmp
export TMPDIR=$TMP
export ORACLE_HOSTNAME=`hostname -s`
export ORACLE_UNQNAME=ORCL
export ORACLE_BASE=/u01/app/oracle
export ORACLE_HOME=$ORACLE_BASE/product/19.3.0/db_1
export ORA_INVENTORY=/u01/app/oraInventory
export ORACLE_SID=ORCL
export PATH=/usr/sbin:/usr/local/bin:$PATH
export PATH=$ORACLE_HOME/bin:$PATH
export LD_LIBRARY_PATH=$ORACLE_HOME/lib:/lib:/usr/lib
export CLASSPATH=$ORACLE_HOME/jlib:$ORACLE_HOME/rdbms/jlib
export GGATE=/u01/app/oracle/product/gg
[oracle@dev19c scripts]$ cd $GGATE
[oracle@dev19c ~]$ . .bash_profile
[oracle@dev19c ~]$ cd $GGATE
[oracle@dev19c gg]$ pwd
/u01/app/oracle/product/gg
Step:-3 Move oracle 19c Goldengate software and unzip
[oracle@dev19c Desktop]$ cd /u01/app/oracle/product/gg
[oracle@dev19c gg]$ ls -lrt
total 543208
-rwxr–r–. 1 oracle oinstall 556240981 Nov 24 17:56 191004_fbo_ggs_Linux_x64_shiphome.zip
[oracle@dev19c gg]$ unzip 191004_fbo_ggs_Linux_x64_shiphome.zip
Archive: 191004_fbo_ggs_Linux_x64_shiphome.zip
creating: fbo_ggs_Linux_x64_shiphome/
creating: fbo_ggs_Linux_x64_shiphome/Disk1/
creating: fbo_ggs_Linux_x64_shiphome/Disk1/install/
inflating: fbo_ggs_Linux_x64_shiphome/Disk1/install/.oui
inflating: fbo_ggs_Linux_x64_shiphome/Disk1/install/attachHome.sh
inflating: fbo_ggs_Linux_x64_shiphome/Disk1/install/clusterparam.ini
inflating: fbo_ggs_Linux_x64_shiphome/Disk1/install/detachHome.sh
[oracle@dev19c gg]$ ls -lrt
total 543548
-rw-r–r–. 1 oracle oinstall 1413 May 29 16:49 OGG-19.1.0.0-README.txt
drwxr-xr-x. 3 oracle oinstall 4096 Oct 18 18:50 fbo_ggs_Linux_x64_shiphome
-rw-r–r–. 1 oracle oinstall 332523 Oct 21 11:01 OGG_WinUnix_Rel_Notes_19.1.0.0.4.pdf
-rwxr–r–. 1 oracle oinstall 556240981 Nov 24 17:56 191004_fbo_ggs_Linux_x64_shiphome.zip
Step:-4 Run the Oracle GoldenGate 19c installer as the oracle user. The installer is located in the /goldengate/fbo_ggs_Linux_x64_shiphome/Disk1 directory.
oracle@dev19c gg]$ ls -lrt
total 543548
-rw-r–r–. 1 oracle oinstall 1413 May 29 16:49 OGG-19.1.0.0-README.txt
drwxr-xr-x. 3 oracle oinstall 4096 Oct 18 18:50 fbo_ggs_Linux_x64_shiphome
-rw-r–r–. 1 oracle oinstall 332523 Oct 21 11:01 OGG_WinUnix_Rel_Notes_19.1.0.0.4.pdf
-rwxr–r–. 1 oracle oinstall 556240981 Nov 24 17:56 191004_fbo_ggs_Linux_x64_shiphome.zip
[oracle@dev19c gg]$ cd fbo_ggs_Linux_x64_shiphome/
[oracle@dev19c fbo_ggs_Linux_x64_shiphome]$ ls
Disk1
[oracle@dev19c fbo_ggs_Linux_x64_shiphome]$ cd Disk1/
[oracle@dev19c Disk1]$ ./runInstaller
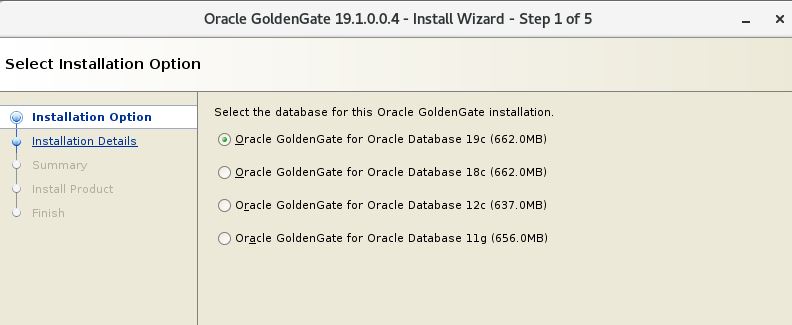
Step:-5 Start oracle 19c goldengate installation
Choose Your database version
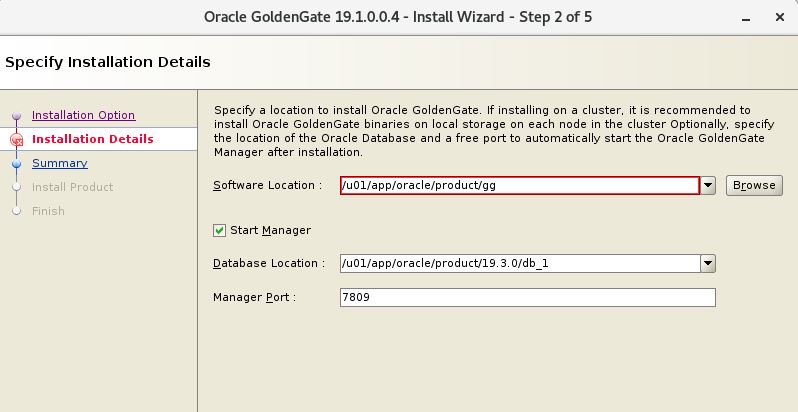
Step:-6 Select Goldengate Home
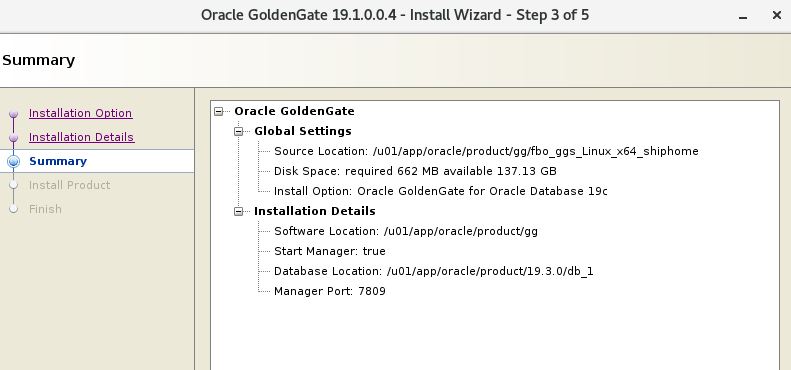
Step:-7 Double check and start installation
Step:-8 Oracle 19c goldengate installation in progress
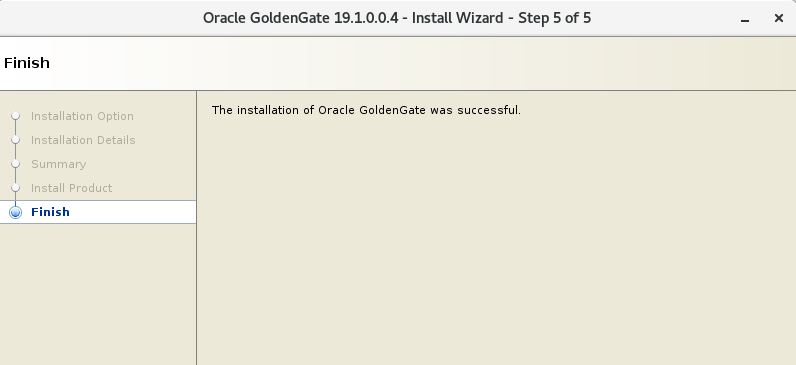
Step:-9 Successfully oracle 19c goldengate installation is completed.
Step:-10 Login to Putty session
Manager is up and running….
Connect with me:-
Telegram App:https://t.me/oracledbwr
LinkedIn:https://www.linkedin.com/in/hariprasathdba
Facebook:https://www.facebook.com/HariPrasathdba
FB Group:https://www.facebook.com/groups/894402327369506/
FB Page : https://www.facebook.com/dbahariprasath/?
Twitter : https://twitter.com/hariprasathdba


