Step by Step configuration ASM for a Standalone Database
Description:-
- In this article we are going to see Step by Step configuration Asm for a Standalone Database.
Four stage we are going to see the demo:-
- Adding Diskgroup in Vmware
- Grid Software installation
- Oracle Software installation
- Asm Standalone Database creation using DBCA Tool
Let’s Start the Demo:-
- Already installed OEL 5.5 in Vmware
Note:-Do not forget the below steps while installing OS OEL5.5
select the package “oracle validated package” and ASM Rpms.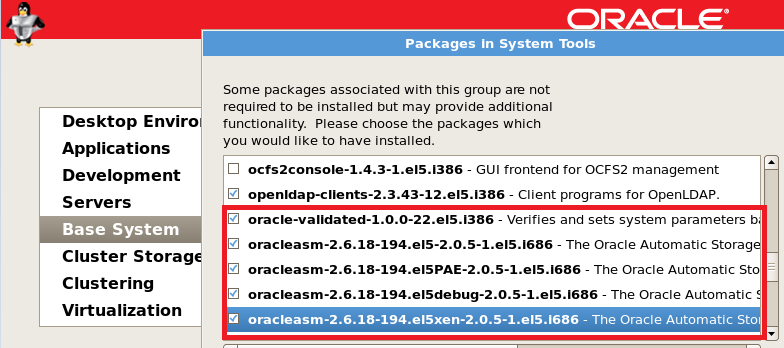
Prepare for oracle binaries installation
Create the directories in which the Oracle software will be installed.
mkdir -p /u01/app/oracle/product/11.2.0/db_1
chown -R oracle:oinstall /u01
chmod -R 775 /u01
Login in to oracle set the bash profile for grid home and oracle home
su – oracle
vi .bash_profile
# Oracle Settings
TMP=/tmp; export TMP
TMPDIR=$TMP; export TMPDIR
ORACLE_HOSTNAME=oracleasm; export ORACLE_HOSTNAME
ORACLE_BASE=/u01/app/oracle; export ORACLE_BASE
GRID_HOME=/u01/app/11.2.0/grid; export GRID_HOME
DB_HOME=$ORACLE_BASE/product/11.2.0/db_1; export DB_HOME
ORACLE_HOME=$DB_HOME; export ORACLE_HOME
ORACLE_SID=RAC1; export ORACLE_SID
ORACLE_TERM=xterm; export ORACLE_TERM
BASE_PATH=/usr/sbin:$PATH; export BASE_PATH
PATH=$ORACLE_HOME/bin:$BASE_PATH; export PATH
LD_LIBRARY_PATH=$ORACLE_HOME/lib:/lib:/usr/lib; export LD_LIBRARY_PATH
CLASSPATH=$ORACLE_HOME/JRE:$ORACLE_HOME/jlib:$ORACLE_HOME/rdbms/jlib; export CLASSPATH
alias grid=’. /home/oracle/grid_env’
alias db=’. /home/oracle/db_env’
vi grid_env
ORACLE_SID=+ASM1; export ORACLE_SID
ORACLE_HOME=$GRID_HOME; export ORACLE_HOME
PATH=$ORACLE_HOME/bin:$BASE_PATH; export PATH
LD_LIBRARY_PATH=$ORACLE_HOME/lib:/lib:/usr/lib; export LD_LIBRARY_PATH
CLASSPATH=$ORACLE_HOME/JRE:$ORACLE_HOME/jlib:$ORACLE_HOME/rdbms/jlib; export CLASSPATH
vi db_env
ORACLE_SID=orcl; export ORACLE_SID
ORACLE_HOME=$DB_HOME; export ORACLE_HOME
PATH=$ORACLE_HOME/bin:$BASE_PATH; export PATH
LD_LIBRARY_PATH=$ORACLE_HOME/lib:/lib:/usr/lib; export LD_LIBRARY_PATH
CLASSPATH=$ORACLE_HOME/JRE:$ORACLE_HOME/jlib:$ORACLE_HOME/rdbms/jlib; export CLASSPATH
DISPLAY=oracleasm:0.0; export DISPLAY
[root@oracleasm ~]# init 0
Adding Disk in Vmware
Double click the Hard Disk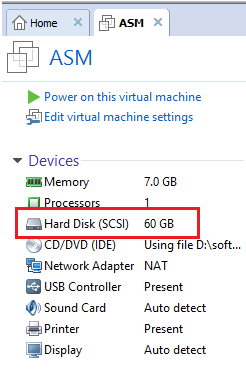 Click Add Button
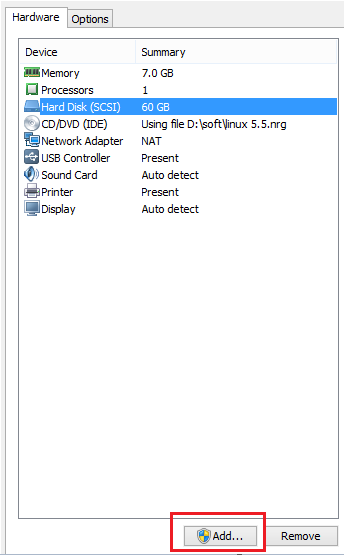
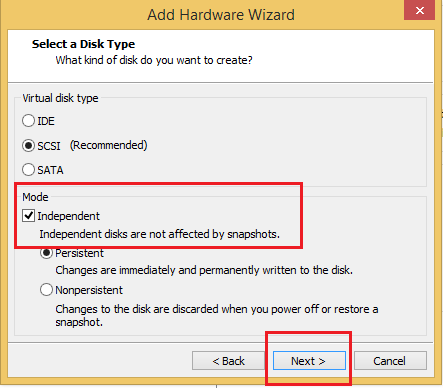
Click Independent Button and Next
 Click Next
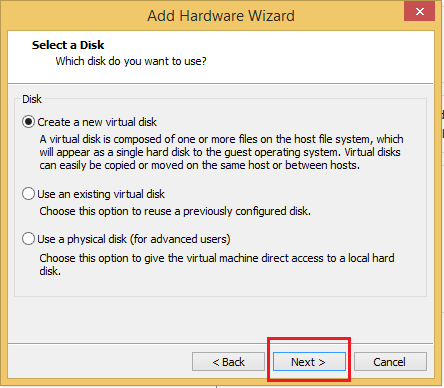
Click Allocate all disk space now (Because Database creation will fast)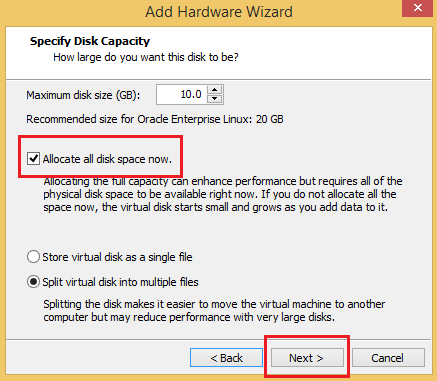 Browse the folder for ASM Disk
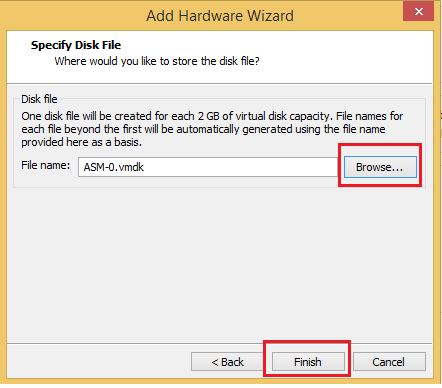 Diskgroup creation in Progress
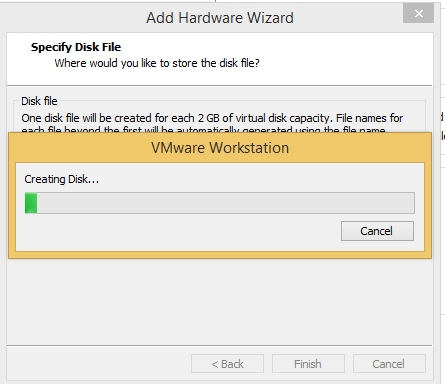
I added 2 Disk groups 10GB and 15GB (same steps follow for the 2nd disk)
 Power on the Vmware and check fdisk -l
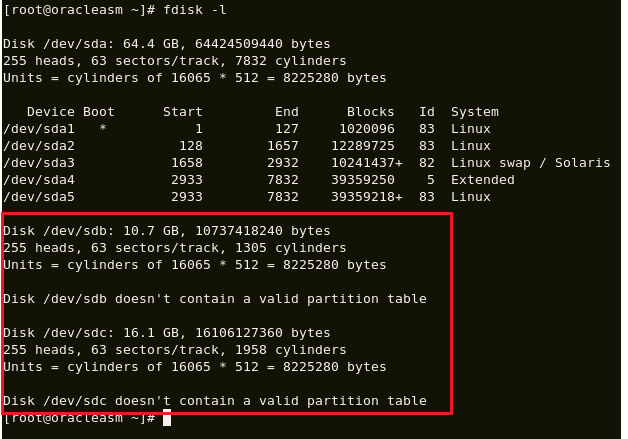
partition the disks
[root@oracleasm ~]# fdisk /dev/sdb
Device contains neither a valid DOS partition table, nor Sun, SGI or OSF disklabel
Building a new DOS disklabel. Changes will remain in memory only,
until you decide to write them. After that, of course, the previous
content won’t be recoverable.
The number of cylinders for this disk is set to 1305.
There is nothing wrong with that, but this is larger than 1024,
and could in certain setups cause problems with:
1) software that runs at boot time (e.g., old versions of LILO)
2) booting and partitioning software from other OSs
(e.g., DOS FDISK, OS/2 FDISK)
Warning: invalid flag 0x0000 of partition table 4 will be corrected by w(rite)
Command (m for help): n
Command action
e extended
p primary partition (1-4)
p
Partition number (1-4): 1
First cylinder (1-1305, default 1):
Using default value 1
Last cylinder or +size or +sizeM or +sizeK (1-1305, default 1305):
Using default value 1305
Command (m for help): w
The partition table has been altered!
Calling ioctl() to re-read partition table.
Syncing disks.
After partition the disks (/dev/sdb1 & /dev/sdc1)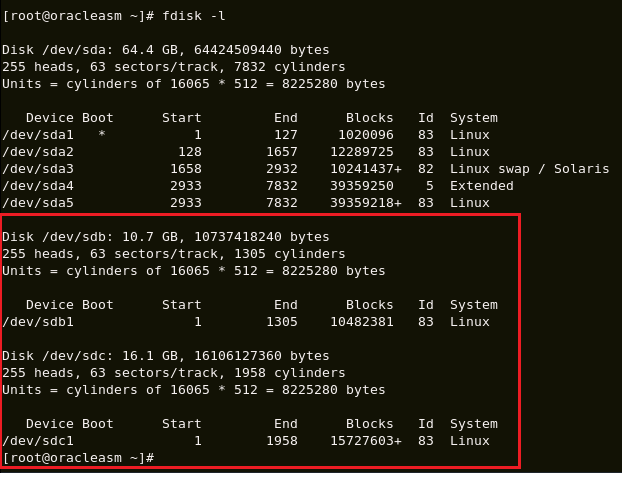
Configure ASMLib using the following command.
[root@oracleasm ~]# oracleasm configure -i
Configuring the Oracle ASM library driver.
This will configure the on-boot properties of the Oracle ASM library
driver. The following questions will determine whether the driver is
loaded on boot and what permissions it will have. The current values
will be shown in brackets (‘[]’). Hitting <ENTER> without typing an
answer will keep that current value. Ctrl-C will abort.
Default user to own the driver interface []: oracle
Default group to own the driver interface []: oinstall
Start Oracle ASM library driver on boot (y/n) [n]: y
Scan for Oracle ASM disks on boot (y/n) [y]:
Writing Oracle ASM library driver configuration: done
[root@oracleasm ~]# /usr/sbin/oracleasm init
Creating /dev/oracleasm mount point: /dev/oracleasm
Loading module “oracleasm”: oracleasm
Mounting ASMlib driver filesystem: /dev/oracleasm
[root@oracleasm ~]# /usr/sbin/oracleasm createdisk DISK1 /dev/sdb1
Writing disk header: done
Instantiating disk: done
[root@oracleasm ~]# /usr/sbin/oracleasm createdisk DISK2 /dev/sdc1
Writing disk header: done
Instantiating disk: done
[oracle@oracleasm disks]$ cd /dev/oracleasm/disks
[oracle@oracleasm disks]$ ls -lrt
total 0
brw-rw—- 1 oracle oinstall 8, 17 Jun 7 22:39 DISK1
brw-rw—- 1 oracle oinstall 8, 33 Jun 7 22:39 DISK2
We have completed the Diskgroup creation at OS LEVEL
Now, We are going to install grid software 11.2.0.3
[root@oracleasm ~]# su – oracle
[oracle@oracleasm ~]$ cd /u01
[oracle@oracleasm u01]$ ls -lrt
total 3363640
drwxrwxr-x 2 oracle oinstall 16384 Jun 7 07:08 lost+found
drwxrwxr-x 3 oracle oinstall 4096 Jun 7 19:18 app
-rwxrwxr-x 1 oracle oinstall 1337967916 Jun 7 21:04 p10404530_112030_LINUX_1of7.zip
-rwxrwxr-x 1 oracle oinstall 1142289834 Jun 7 21:05 p10404530_112030_LINUX_2of7.zip
-rwxrwxr-x 1 oracle oinstall 960703760 Jun 7 21:06 p10404530_112030_LINUX_3of7.zip
Unzip start installing Grid Software
[oracle@oracleasm ~]$ . .bash_profile
[oracle@oracleasm ~]$ grid
[oracle@oracleasm ~]$ echo $ORACLE_HOME
/u01/app/11.2.0/grid
[oracle@oracleasm ~]$ cd /u01/grid
[oracle@oracleasm grid]$ ./runInstaller
Click configure oracle grid infrastructure for standalone server
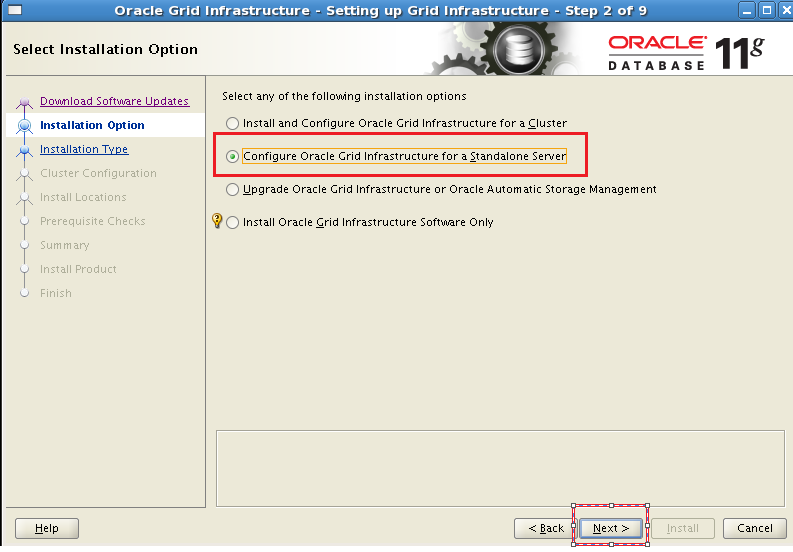
Click next
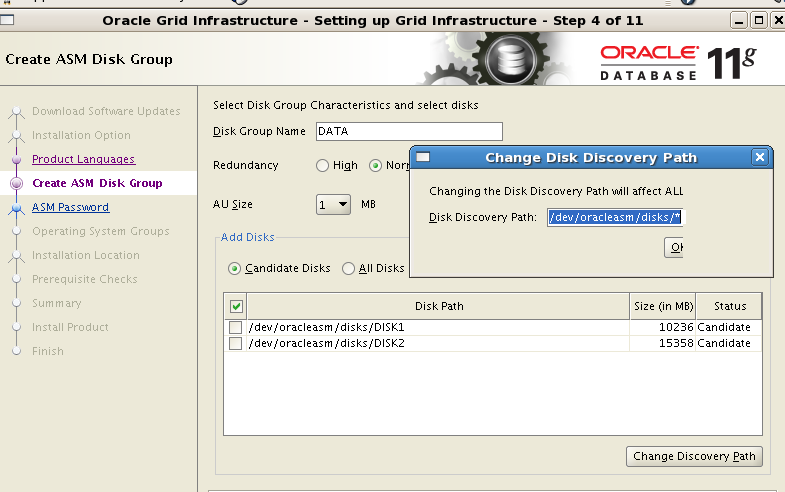
Browse the location and see the disks(/dev/oracleasm/disks)
Allocate the password

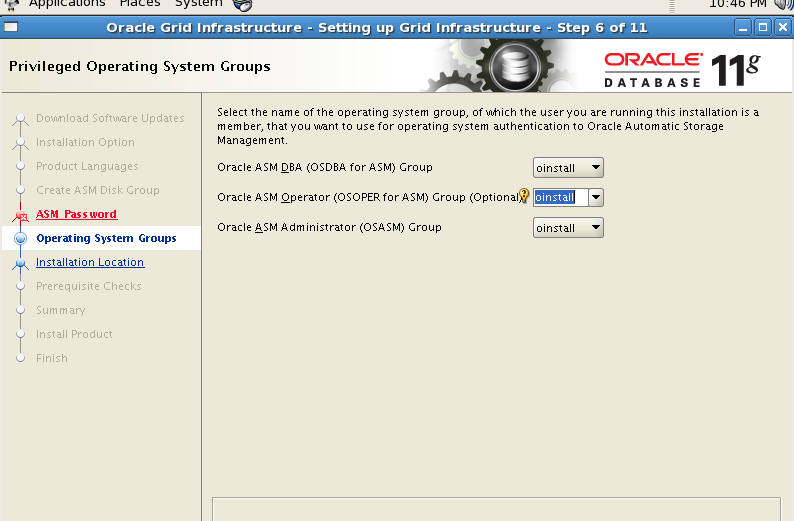
set the Asm group
Set the grid home
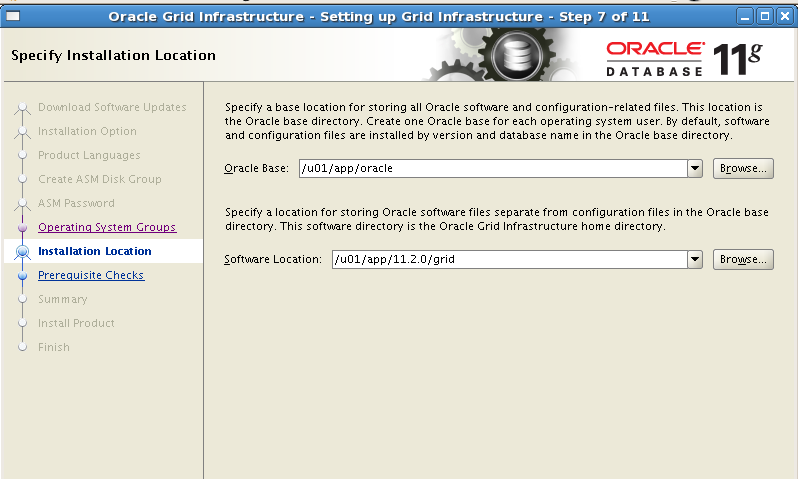
Click next
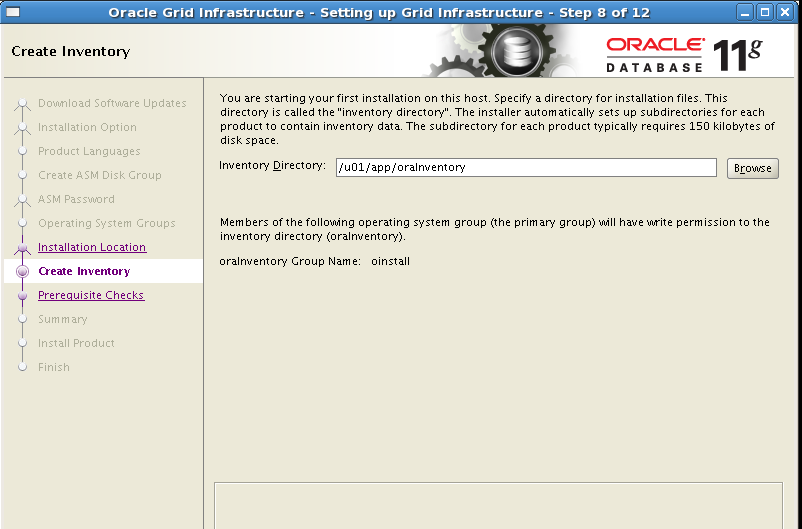
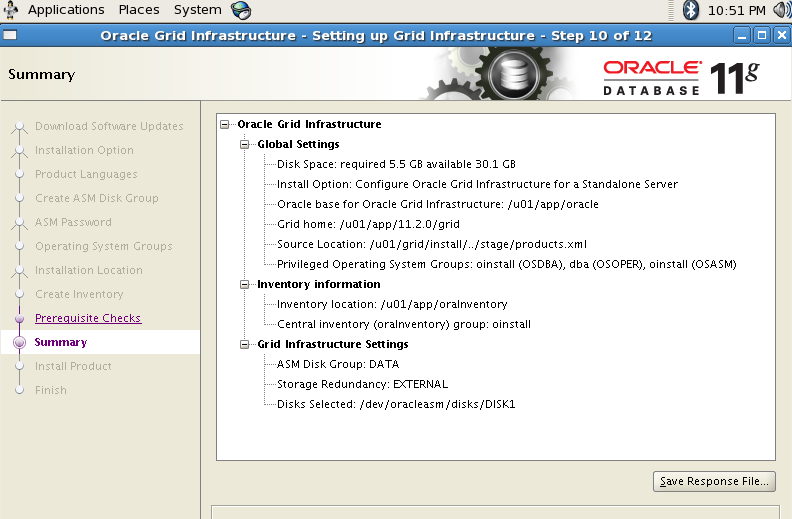
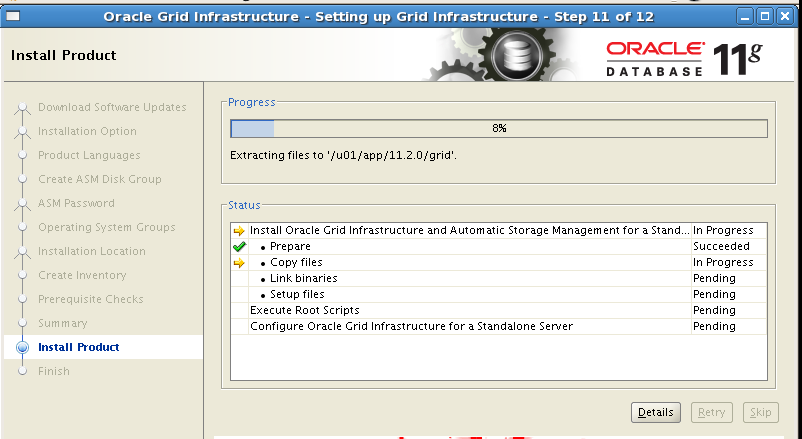
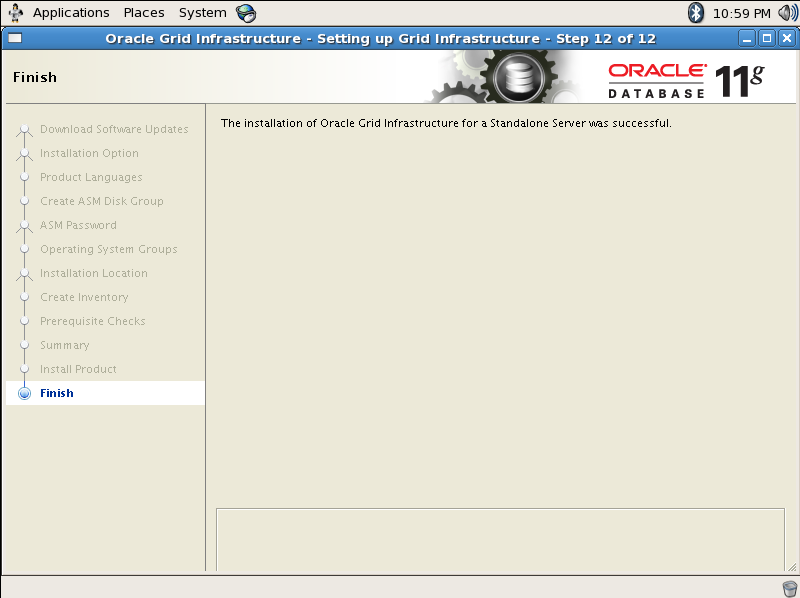
Click Finish
Grid software installation in progress
Login in to Root user and run the below script

[oracle@oracleasm grid]$ su – root
Password:
[root@oracleasm ~]# /u01/app/oraInventory/orainstRoot.sh
Changing permissions of /u01/app/oraInventory.
Adding read,write permissions for group.
Removing read,write,execute permissions for world.
Changing groupname of /u01/app/oraInventory to oinstall.
The execution of the script is complete.
[root@oracleasm ~]# /u01/app/11.2.0/grid/root.sh
Performing root user operation for Oracle 11g
The following environment variables are set as:
ORACLE_OWNER= oracle
ORACLE_HOME= /u01/app/11.2.0/grid
Enter the full pathname of the local bin directory: [/usr/local/bin]:
Copying dbhome to /usr/local/bin …
Copying oraenv to /usr/local/bin …
Copying coraenv to /usr/local/bin …
Creating /etc/oratab file…
Entries will be added to the /etc/oratab file as needed by
Database Configuration Assistant when a database is created
Finished running generic part of root script.
Now product-specific root actions will be performed.
Using configuration parameter file: /u01/app/11.2.0/grid/crs/install/crsconfig_params
Creating trace directory
LOCAL ADD MODE
Creating OCR keys for user ‘oracle’, privgrp ‘oinstall’..
Operation successful.
LOCAL ONLY MODE
Successfully accumulated necessary OCR keys.
Creating OCR keys for user ‘root’, privgrp ‘root’..
Operation successful.
CRS-4664: Node oracleasm successfully pinned.
Adding Clusterware entries to inittab
oracleasm 2018/06/07 22:56:55 /u01/app/11.2.0/grid/cdata/oracleasm/backup_20180607_225655.olr
Successfully configured Oracle Grid Infrastructure for a Standalone Server
11.2.0.3 Grid software successfully completed.
Next we are going to install oracle binaries
[oracle@oracleasm u01]$ ls -lrt
total 3363648
drwxr-xr-x 8 oracle oinstall 4096 Sep 22 2011 database
drwxr-xr-x 8 oracle oinstall 4096 Sep 22 2011 grid
drwxrwxr-x 2 oracle oinstall 16384 Jun 7 07:08 lost+found
-rwxrwxr-x 1 oracle oinstall 1337967916 Jun 7 21:04 p10404530_112030_LINUX_1of7.zip
-rwxrwxr-x 1 oracle oinstall 1142289834 Jun 7 21:05 p10404530_112030_LINUX_2of7.zip
-rwxrwxr-x 1 oracle oinstall 960703760 Jun 7 21:06 p10404530_112030_LINUX_3of7.zip
drwxrwxr-x 5 oracle oinstall 4096 Jun 7 22:52 app
[oracle@oracleasm ~]$ . .bash_profile
[oracle@oracleasm ~]$ db
[oracle@oracleasm ~]$ cd /u01/database
[oracle@oracleasm database]$ ./runInstaller
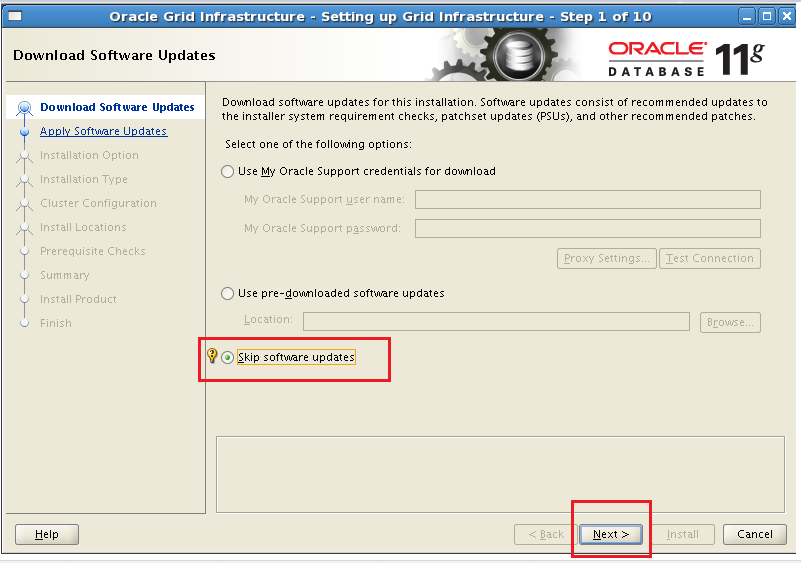
Uncheck the box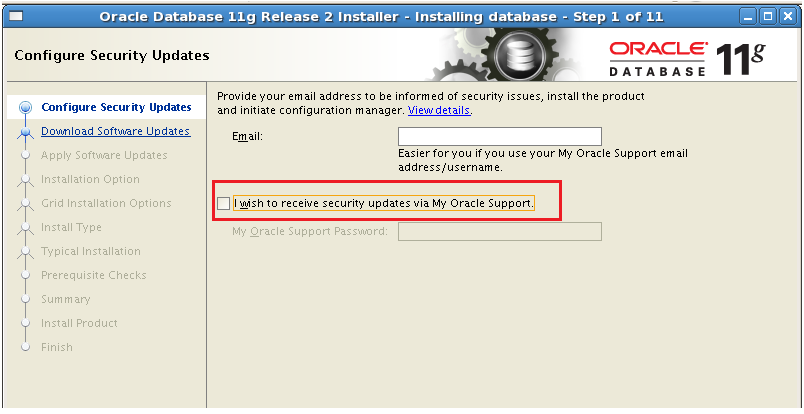
Click skip software update 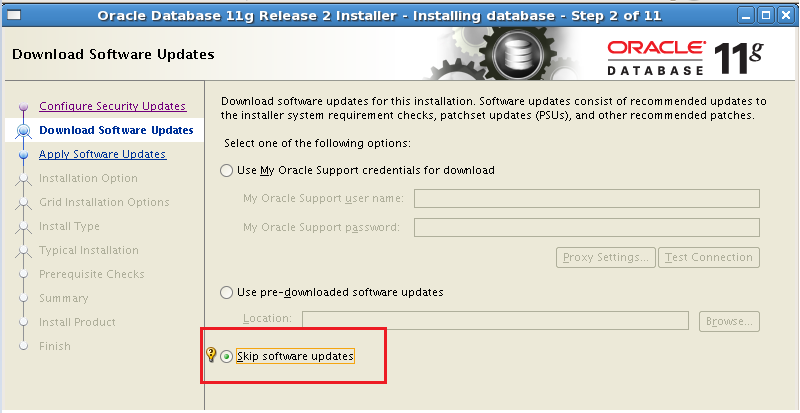
Click create and configure database or Here click install database software only after using DBCA we will create new DB 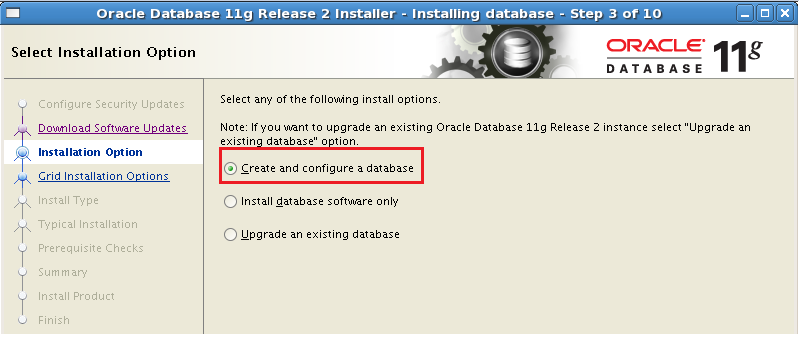
Click Desktop Class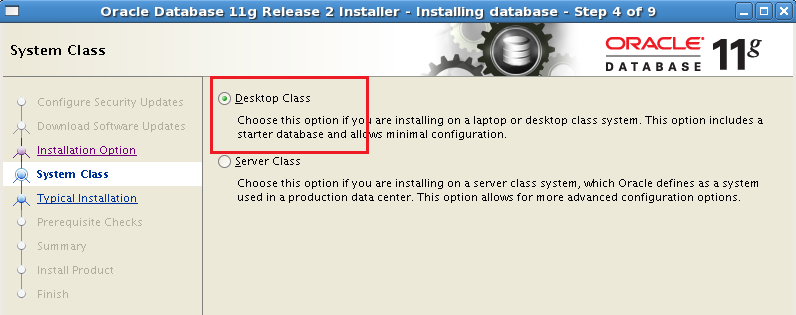
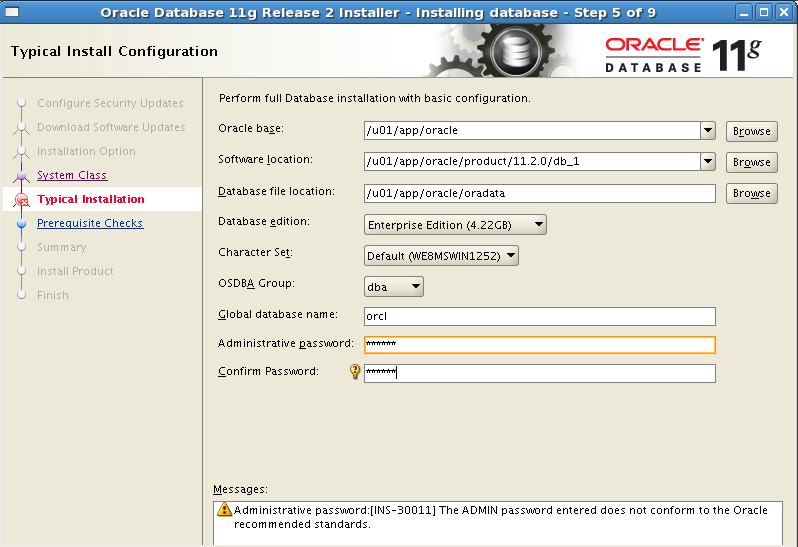
Database name and password

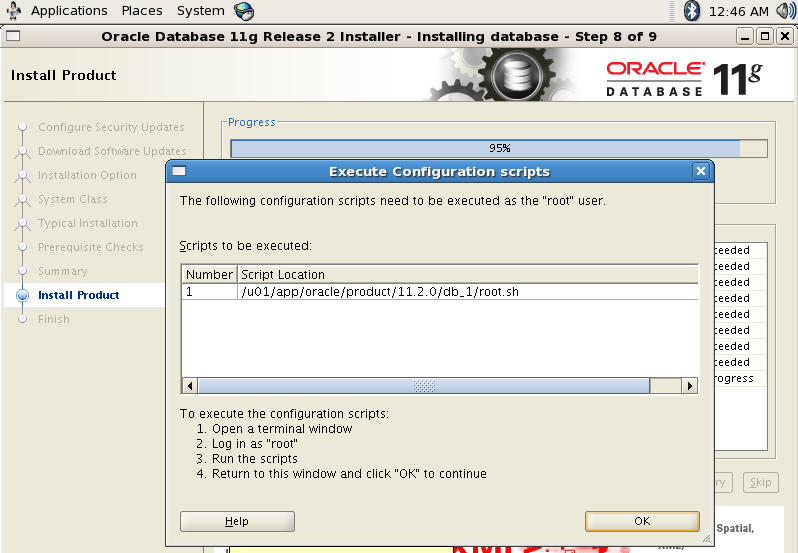
[root@oracleasm ~]# /u01/app/oracle/product/11.2.0/db_1/root.sh
Performing root user operation for Oracle 11g
The following environment variables are set as:
ORACLE_OWNER= oracle
ORACLE_HOME= /u01/app/oracle/product/11.2.0/db_1
Enter the full pathname of the local bin directory: [/usr/local/bin]:
The contents of “dbhome” have not changed. No need to overwrite.
The contents of “oraenv” have not changed. No need to overwrite.
The contents of “coraenv” have not changed. No need to overwrite.
Entries will be added to the /etc/oratab file as needed by
Database Configuration Assistant when a database is created
Finished running generic part of root script.
Now product-specific root actions will be performed.
Finished product-specific root actions.
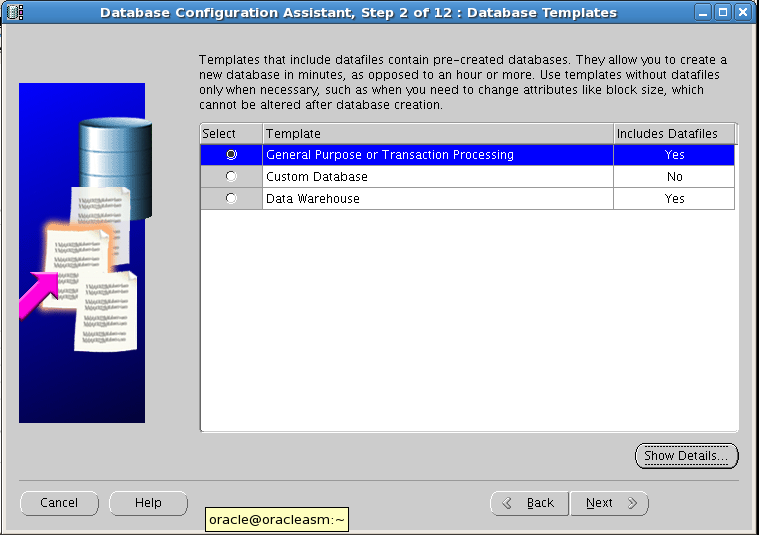
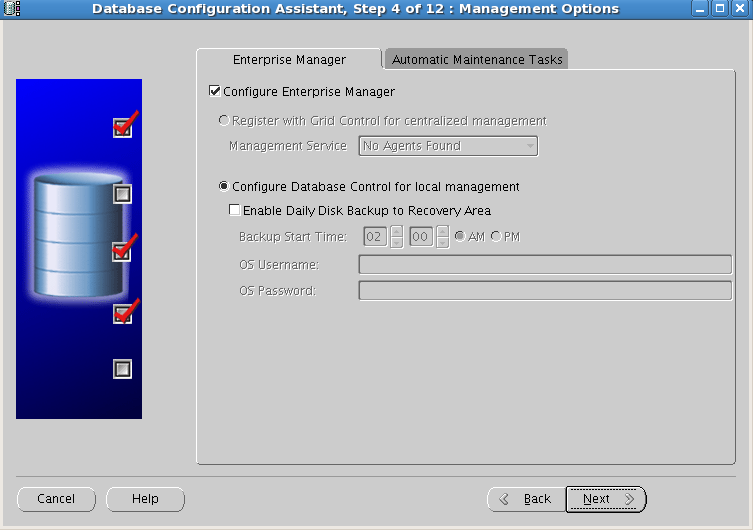
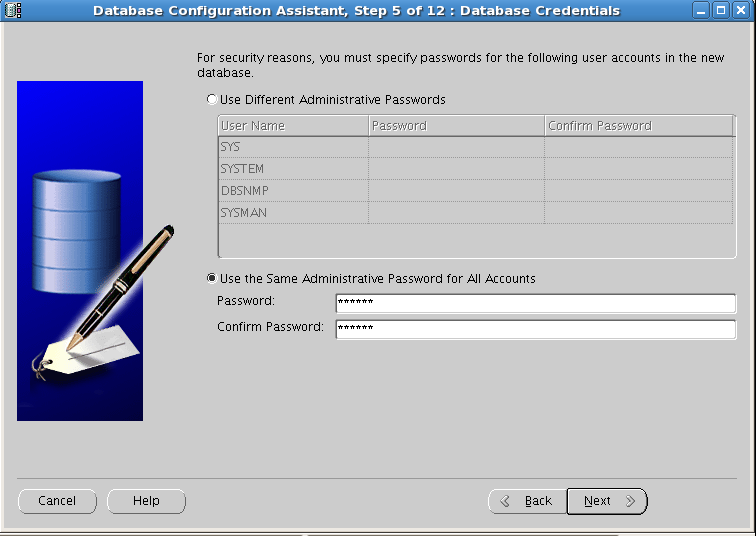
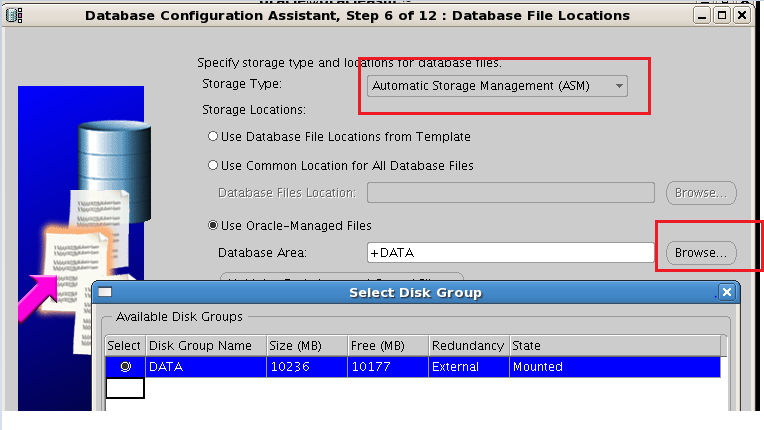
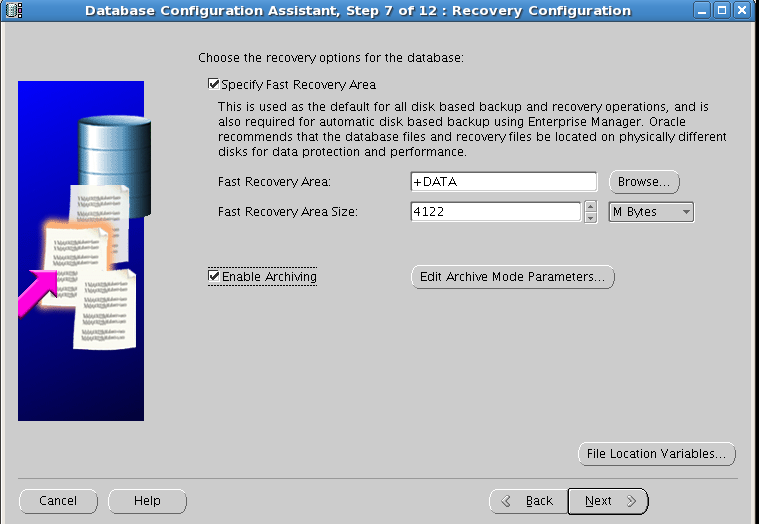
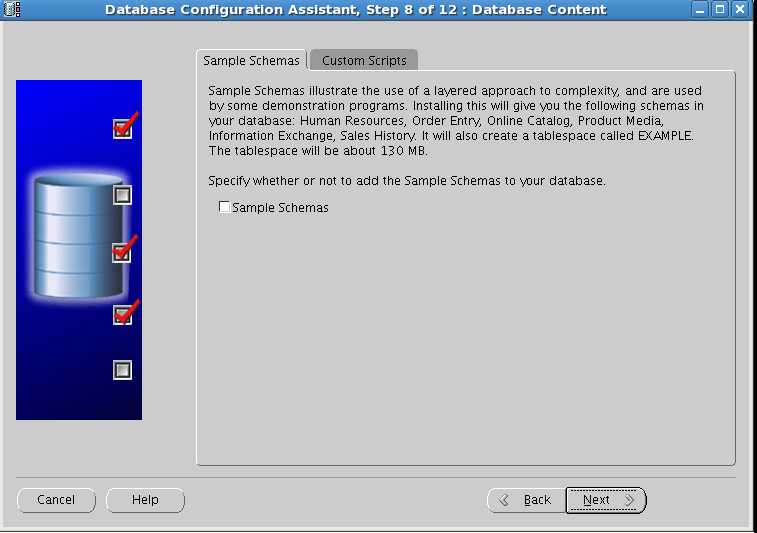
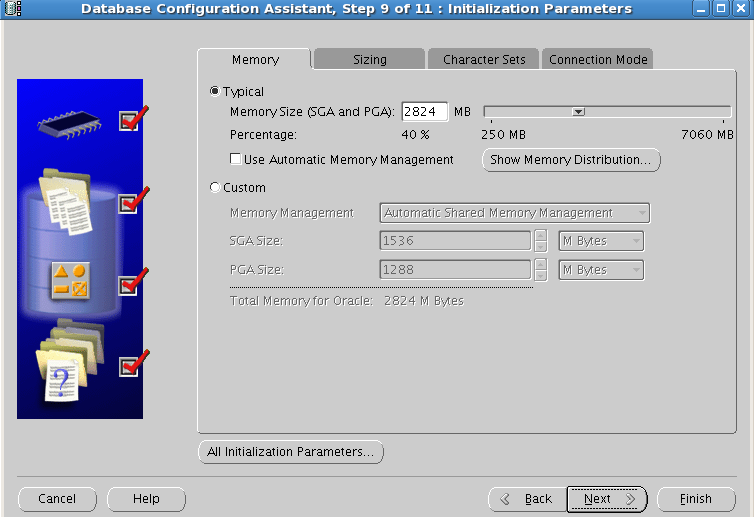
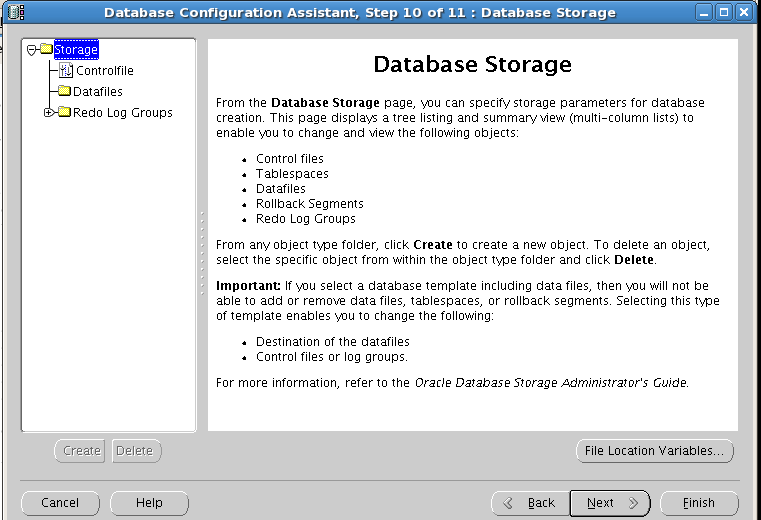
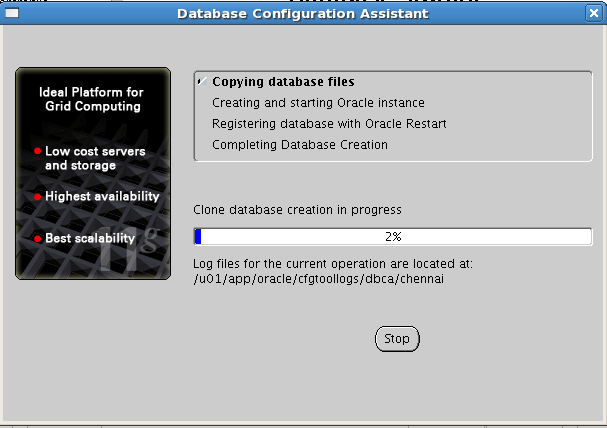
ASM database creation using DBCA Tool.


[oracle@oracleasm ~]$ export ORACLE_SID=chennai
[oracle@oracleasm ~]$ sqlplus ‘/as sysdba’
SQL*Plus: Release 11.2.0.3.0 Production on Fri Jun 8 01:15:32 2018
Copyright (c) 1982, 2011, Oracle. All rights reserved.
Connected to:
Oracle Database 11g Enterprise Edition Release 11.2.0.3.0 – Production
With the Partitioning, Automatic Storage Management, OLAP, Data Mining
and Real Application Testing options
SQL> select name from v$database;
NAME
———
CHENNAI
SQL> select name from v$datafile;
NAME
————————————————-
+DATA/chennai/datafile/system.256.978224651
+DATA/chennai/datafile/sysaux.257.978224651
+DATA/chennai/datafile/undotbs1.258.978224651
+DATA/chennai/datafile/users.259.978224651
Catch Me On:- Hariprasath Rajaram
LinkedIn:https://www.linkedin.com/in/hari-prasath-aa65bb19/
Facebook:https://www.facebook.com/HariPrasathdba
FB Group:https://www.facebook.com/groups/894402327369506/
FB Page: https://www.facebook.com/dbahariprasath/?
Twitter: https://twitter.com/hariprasathdba