Description:-
In this article we are going to see step by step oracle 19c ASM configuration for a Standalone Database
Note:- Click the below link to complete oracle 19c Grid and oracle installation
Step:-1 Oracle Cloud Vm Machine-Create VM machine For Oracle 19c ASM Configuration
Step:-2 Oracle Cloud Vm Machine-Oracle 19c Configuration ASM Storage For A Standalone Database
Step:-3 Oracle Cloud Vm Machine-Oracle 19c Configuration Grid And Database Installation
Step:-4 Oracle Cloud Vm Machine-Oracle 19c installation Grid Infrastructure for a Standalone Server
Step:-5 Oracle Cloud Vm Machine-Oracle 19c installation for a Standalone Server
High level steps:-
- Open ports for connecting internet
- Check internet is working
- Adding asm storage
- Attach Block Volume to Vm instance
- Execute the iscsi commands
- Format the attached block
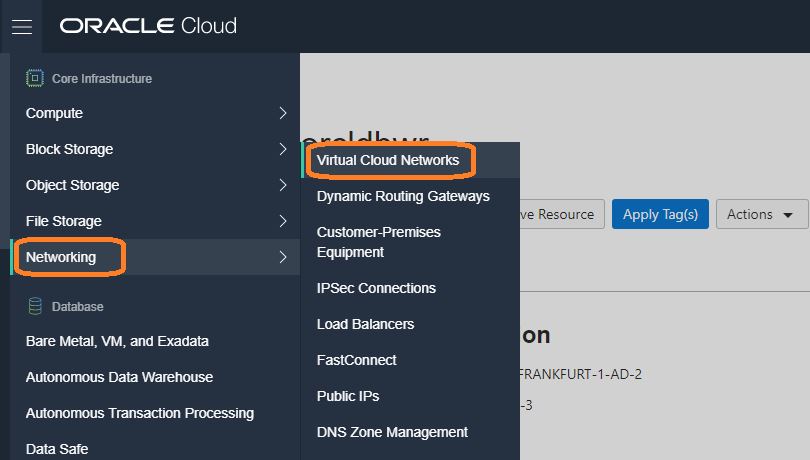
Step:-1 Open ports and allow other networks to connect to OCI.
Step:-2 Select Vnc
Step:- 3 Select security and open the ports
Step:-5 login to putty and check internet is working (for installing rpm’s and download software)
Adding Oracle 19c asm Storage for oracle cloud VM
Step:1 Now create the block volume with below steps from My Services
Step:-2 Click create block volume button
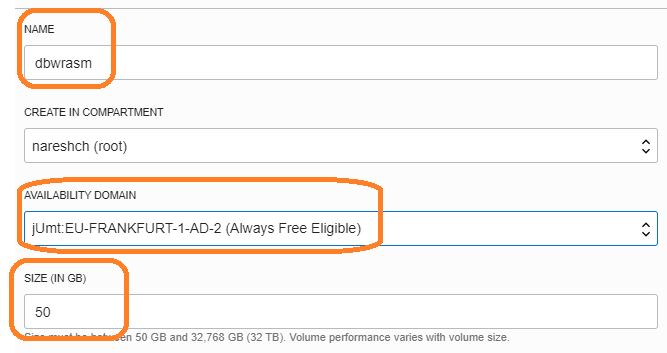
Step:-3 Select Create Block Volume for oracle asm
a) enter name
b)change to free eligible
c)select 50 GB.(free up to 100GB)
d)create block volume
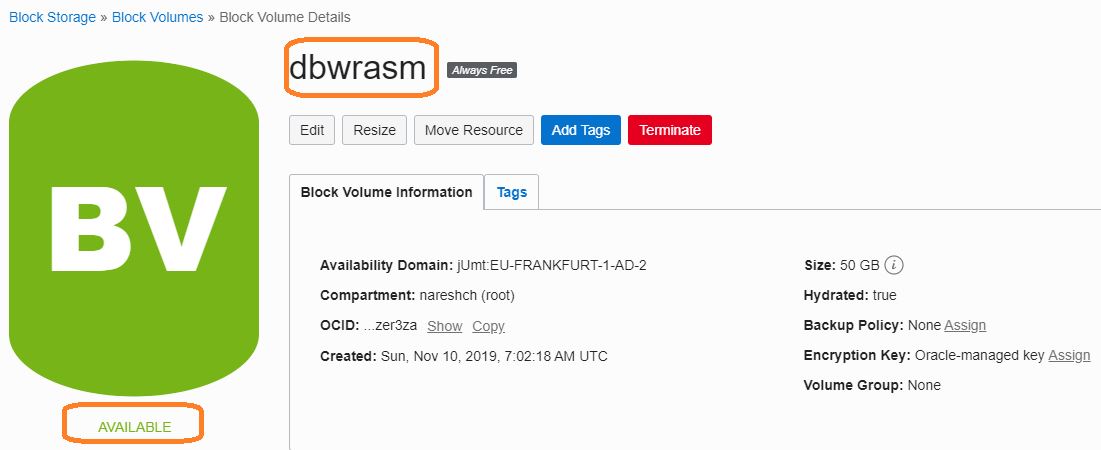
Step:-4 Block volume is ready to use
Step:- 5 Attach Block volume to instance
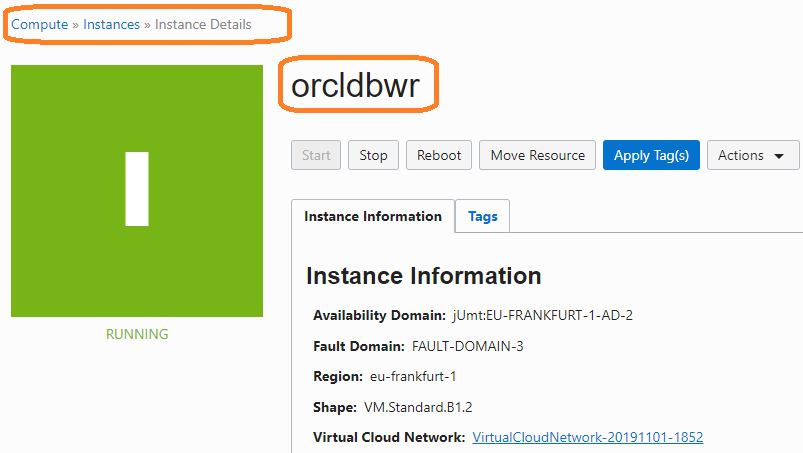
Now, go to the Instance Details page and Attach the block volumes
Step:-6 click Attach Block Volume
Step:-7 Provide a Block Volume Name and select any of the Device path for the block volume.
Step:-8 Block is Attached to the VM instance
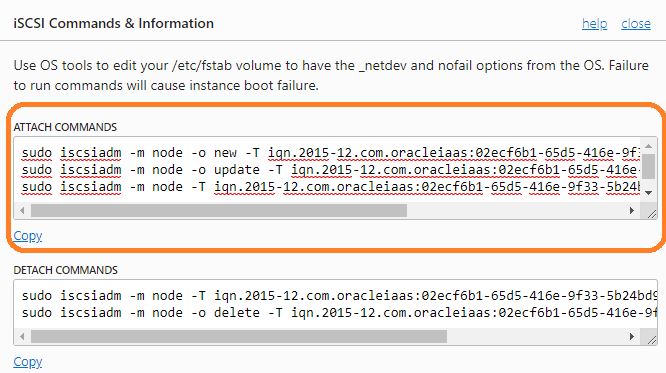
Step:-9 Select “iSCSI Commands & Information” and run the execute the commands in the server to attach the block volumes
Step:-10 Select “iSCSI Commands & Information” from Block Volume Details page and copy
Step:-11 Execute the iscsi commands as opc user or root user.
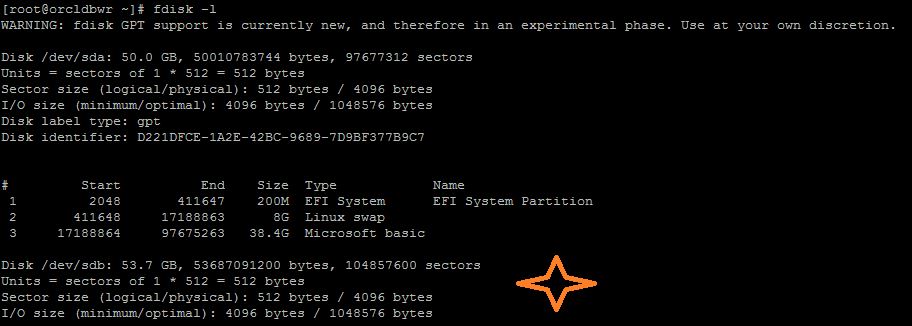
Step:-12 Check the attached disks in the server.
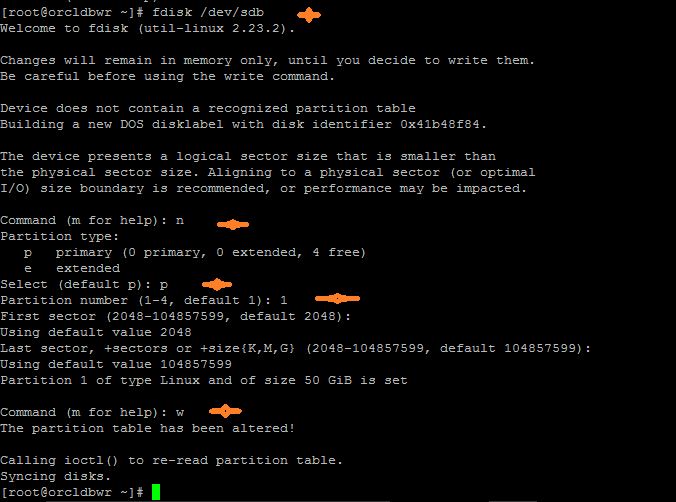
Step:- 13 Format the attached block volumes with fdisk options.
[root@orcldbwr ~]# fdisk /dev/sdb
Welcome to fdisk (util-linux 2.23.2).
Changes will remain in memory only, until you decide to write them.
Be careful before using the write command.
Device does not contain a recognized partition table
Building a new DOS disklabel with disk identifier 0x41b48f84.
The device presents a logical sector size that is smaller than
the physical sector size. Aligning to a physical sector (or optimal
I/O) size boundary is recommended, or performance may be impacted.
Command (m for help): n
Partition type:
p primary (0 primary, 0 extended, 4 free)
e extended
Select (default p): p
Partition number (1-4, default 1): 1
First sector (2048-104857599, default 2048):
Using default value 2048
Last sector, +sectors or +size{K,M,G} (2048-104857599, default 104857599):
Using default value 104857599
Partition 1 of type Linux and of size 50 GiB is set
Command (m for help): w
The partition table has been altered!
Calling ioctl() to re-read partition table.
Syncing disks.
Next post:-
Step:-1 Oracle Cloud Vm Machine-Create VM machine For Oracle 19c ASM Configuration
Step:-2 Oracle Cloud Vm Machine-Oracle 19c Configuration ASM Storage For A Standalone Database
Step:-3 Oracle Cloud Vm Machine-Oracle 19c Configuration Grid And Database Installation
Step:-4 Oracle Cloud Vm Machine-Oracle 19c installation Grid Infrastructure for a Standalone Server
Step:-5 Oracle Cloud Vm Machine-Oracle 19c installation for a Standalone Server
Catch Me On:- Hariprasath Rajaram
LinkedIn:https://www.linkedin.com/in/hari-prasath-aa65bb19/
Facebook:https://www.facebook.com/HariPrasathdba
FB Group:https://www.facebook.com/groups/894402327369506/
FB Page: https://www.facebook.com/dbahariprasath/?
Twitter: https://twitter.com/hariprasathdba
