Description:-
In this article we are going to see how to Configuration ASM On Oracle Cloud VM.
High Level Steps:-
- Create a new pair of Public and Private key pair require to upload using PUTTYGEN. (Check Here).
- Lunch the Create Instance wizard from the web console to create your instance.
- Choose an operating system or image source is oracle images
- Assign a public ip address
- Add SSH Key6)Create a VM instance
Note:- Click the below link to complete oracle 19c Grid and oracle installation
Step:-1 Oracle Cloud Vm Machine-Create VM machine For Oracle 19c ASM Configuration
Step:-2 Oracle Cloud Vm Machine-Oracle 19c Configuration ASM Storage For A Standalone Database
Step:-3 Oracle Cloud Vm Machine-Oracle 19c Configuration Grid And Database Installation
Step:-4 Oracle Cloud Vm Machine-Oracle 19c installation Grid Infrastructure for a Standalone Server
Step:-5 Oracle Cloud Vm Machine-Oracle 19c installation for a Standalone Server
Create the VM instance (login into oracle cloud)
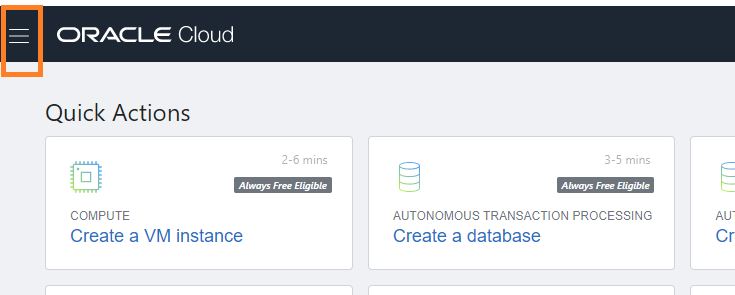
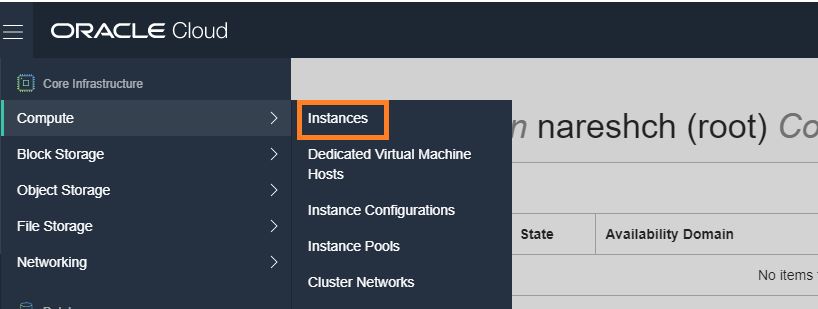
Step:-1 To create a new VM instance, on the main menu click Compute, then select Instances.
Step:-2 Click instance
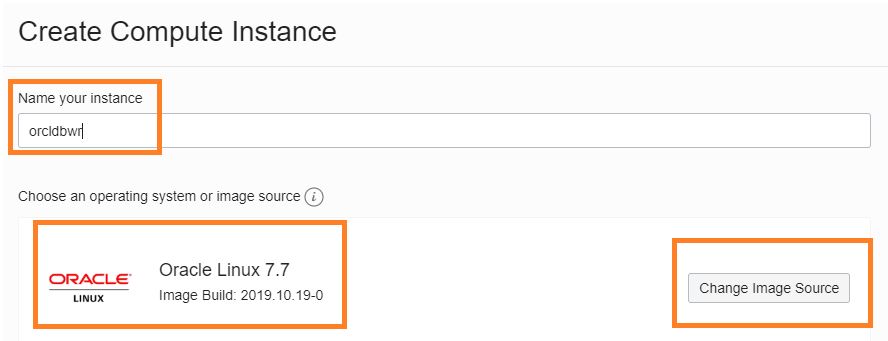
Step:-4 In the Create Compute Instance page use the information below and click and Create
Note:-For oracle 19c i have choosed oracle 7.7
Name your instance: orcldbwr
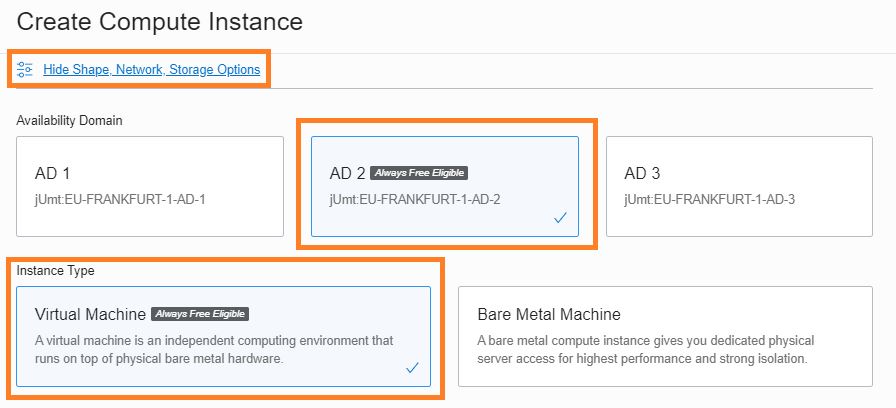
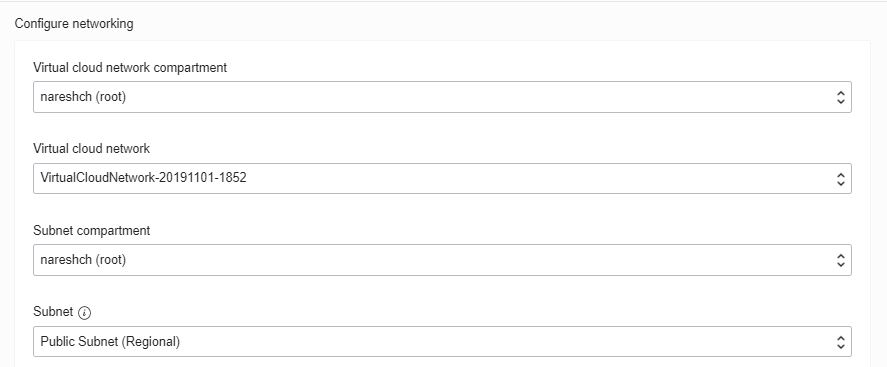
Step:-5 In the Create Compute Instance page use the information below and click and next
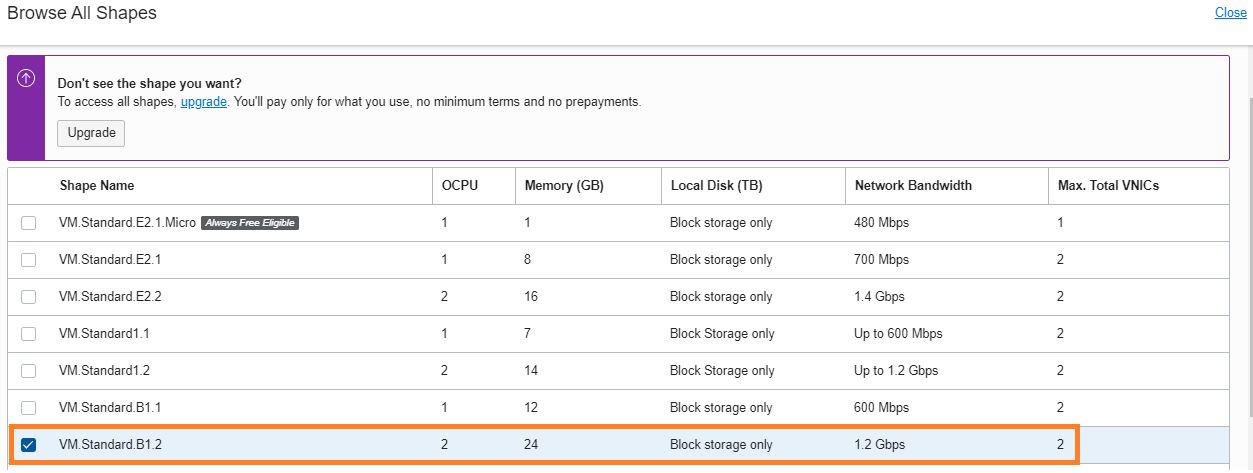
Step:-6 In the Create Compute Instance page use the information below and click instance shape and change shape
 Step:-7 In the Create Compute Instance page use the information below and browse all shape Click 2OCPU and 24 GB Memory
Step:-8 In the Create Compute Instance page use the information below and click and Create
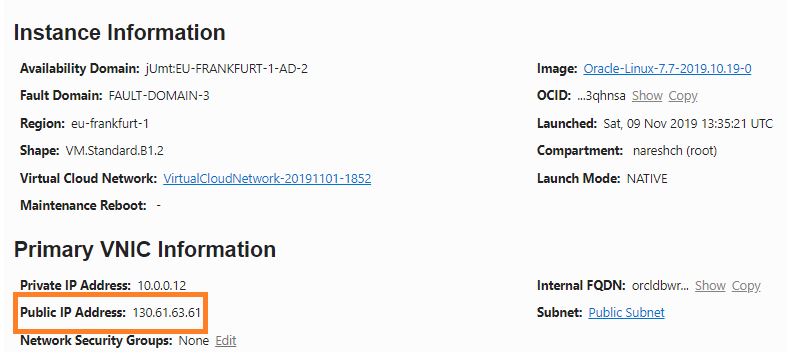
Step:-9 In the Create Compute Instance page use the information below and click Assign a public IP address
Note:-Storage 46 GB is enough to install oracle 19c grid and oracle 19c database binaries 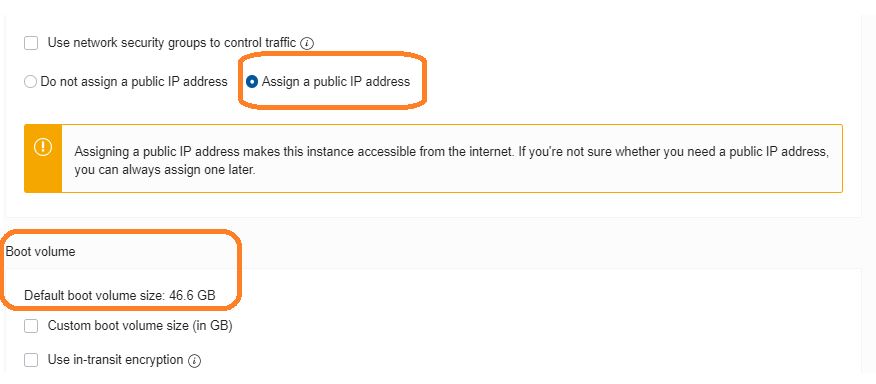
Step:-10 Add SSH KEY(which you generated before starting the VM instance using puttygen)
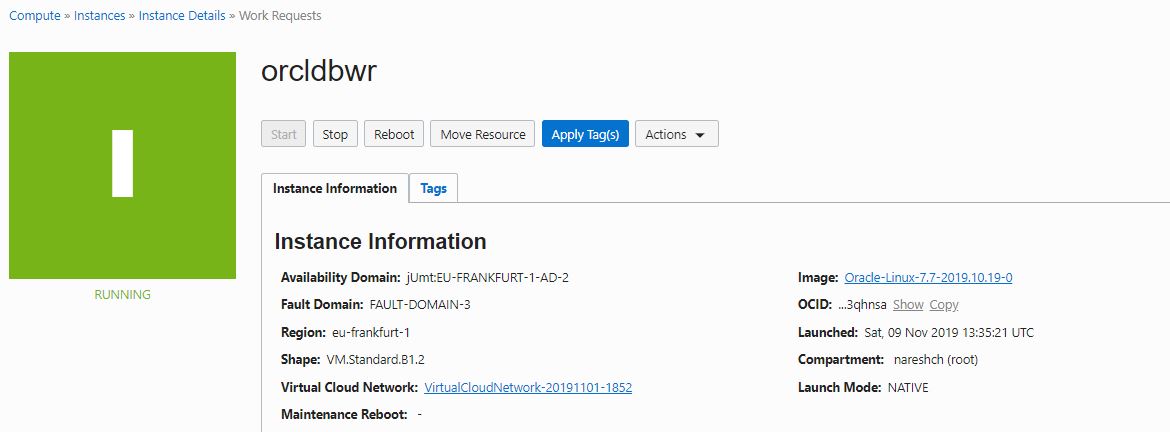
Step:-11 Create a vm Instance for Oracle 19c asm standalone database
Step:-12 vm Instance ready for Oracle 19c asm standalone database.
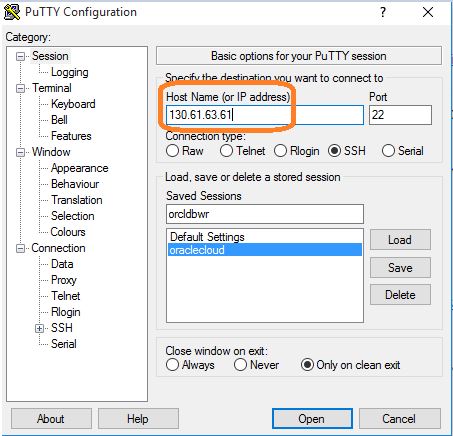
Step:-13 Login in to putty session using public ip
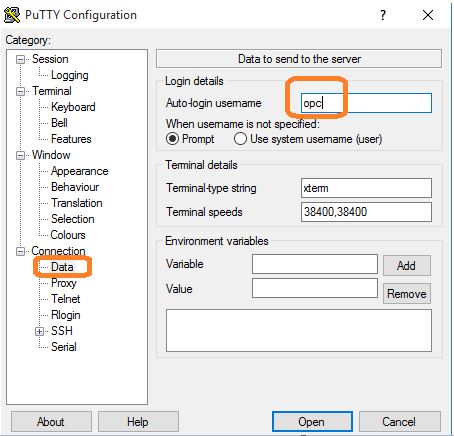
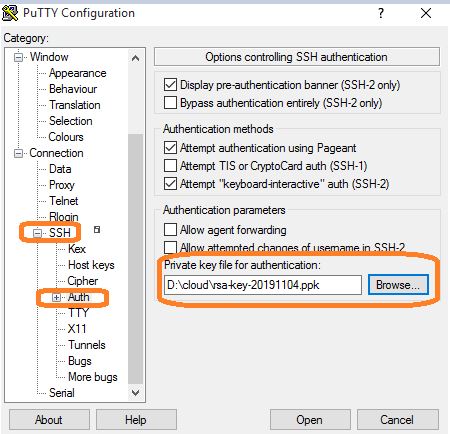
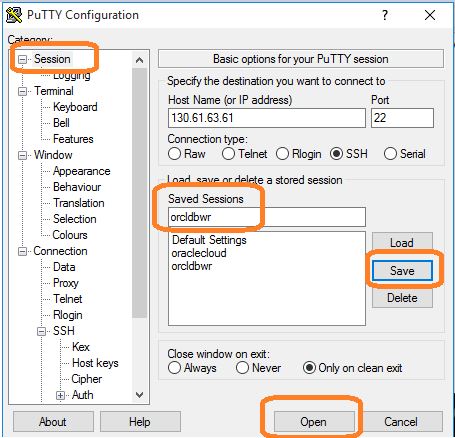
Step:-14 Login in to putty session using public ip
- Enter IP Address
- Click Data and enter opc
- Click ssh button -> auth and browse private key in your machine
- Click session -> orcldbwr -> save -> open
Step:-15 vm compute machine is ready use for oracle 19c grid and oracle binaries installation
Next post:-
Step:-1 Oracle Cloud Vm Machine-Create VM machine For Oracle 19c ASM Configuration
Step:-2 Oracle Cloud Vm Machine-Oracle 19c Configuration ASM Storage For A Standalone Database
Step:-3 Oracle Cloud Vm Machine-Oracle 19c Configuration Grid And Database Installation
Step:-4 Oracle Cloud Vm Machine-Oracle 19c installation Grid Infrastructure for a Standalone Server
Step:-5 Oracle Cloud Vm Machine-Oracle 19c installation for a Standalone Server
Connect with me:-
Telegram App:https://t.me/oracledbwr
LinkedIn:https://www.linkedin.com/in/hariprasathdba
Facebook:https://www.facebook.com/HariPrasathdba
FB Group:https://www.facebook.com/groups/894402327369506/
FB Page : https://www.facebook.com/dbahariprasath/?
Twitter : https://twitter.com/hariprasathdba


